
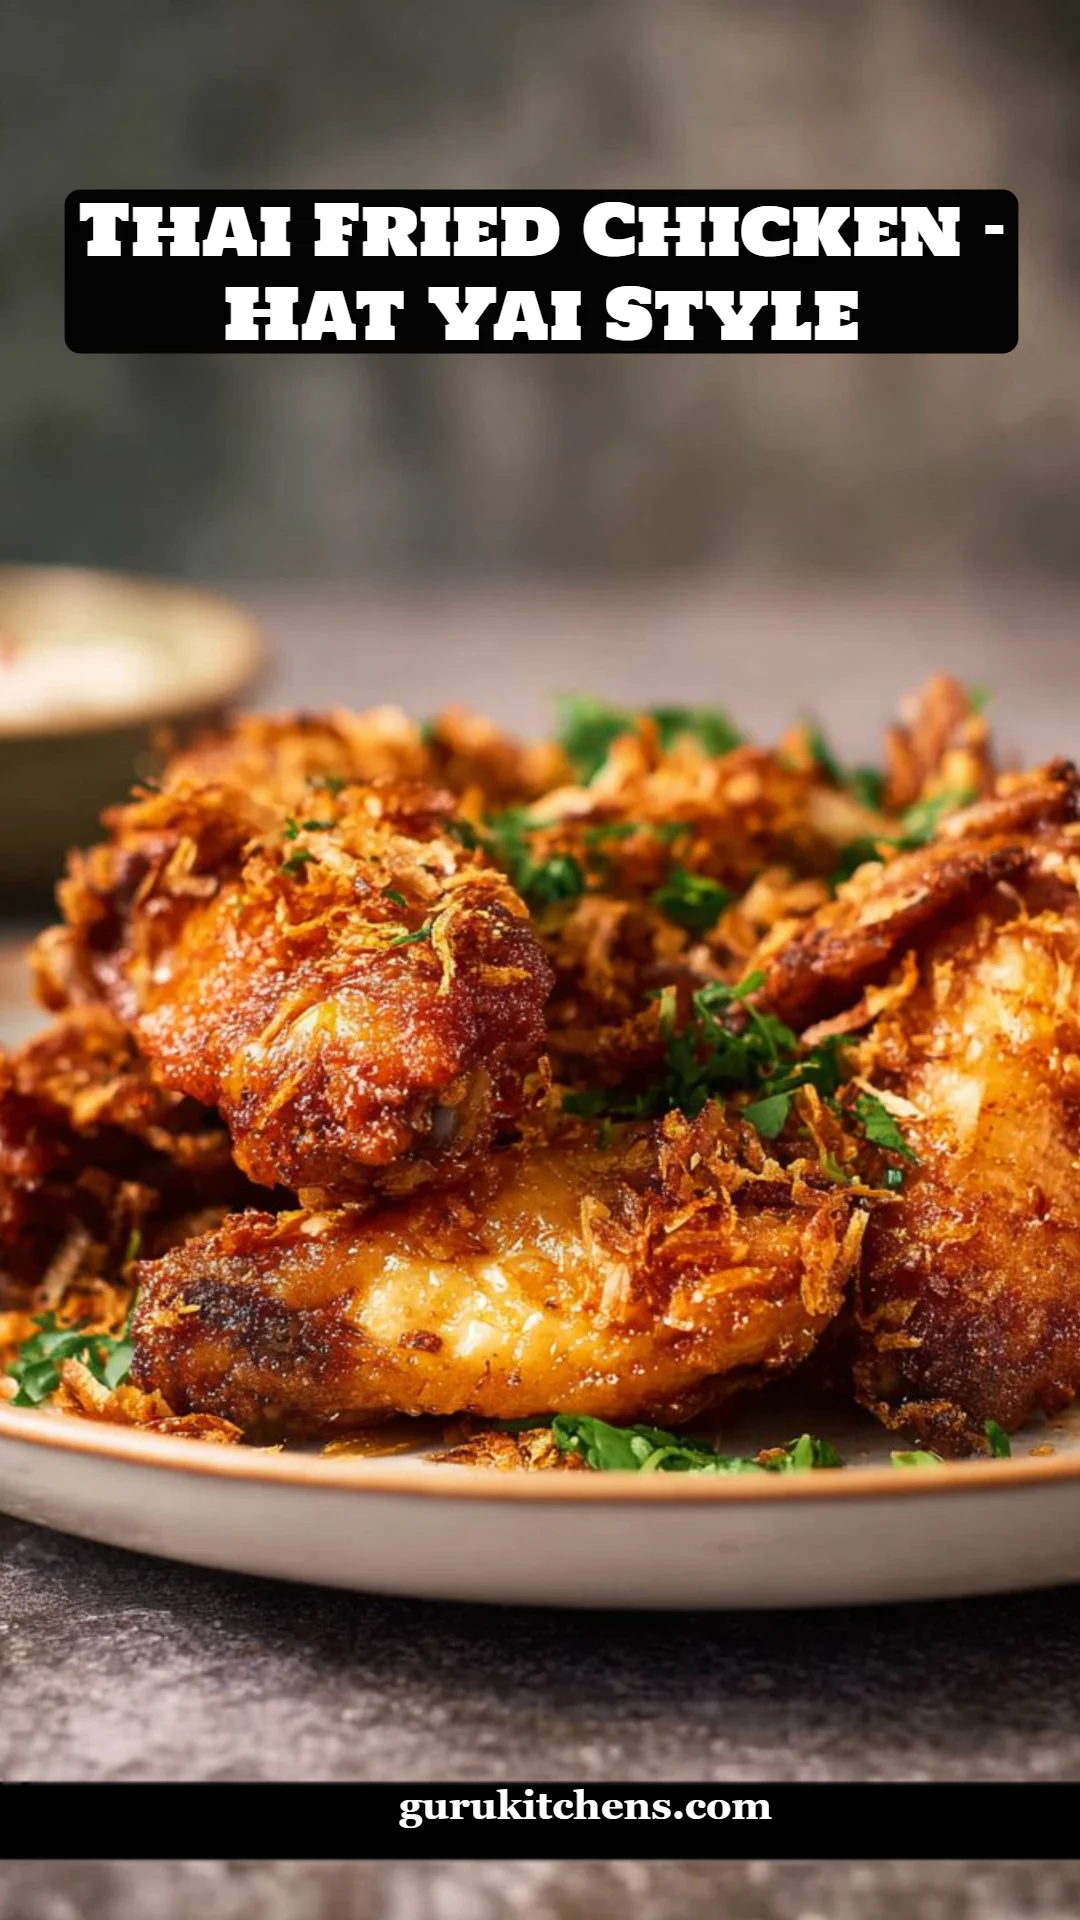
Heavenly Thai Fried Chicken – Hat Yai Style: Your Ultimate Guide to Crispy, Flavorful Perfection!
There’s something about the aroma of Thai Fried Chicken – Hat Yai Style that can instantly transport me back to my childhood. I still remember the bustling Sunday markets we used to visit with my family in Thailand, where the scent of sizzling chicken and fragrant herbs filled the air. As soon as we arrived, I would dash toward the food stalls, my mouth watering in anticipation. The crispy skin and tender meat of that street food classic were simply unforgettable, and they quickly became a comfort food staple in our home.
What makes Thai Fried Chicken – Hat Yai Style so special is its perfect blend of flavors: aromatic garlic, peppery hints from white peppercorns, and the umami punch of soy and fish sauces, all working together to create a chicken dish that’s sticky, spicy, and utterly delicious. Unlike many other fried chicken recipes that focus more on the dusting of spices, this one infuses flavor into every bite through a soulful marinade and an especially crispy coating.
Join me on a culinary adventure as we recreate this beloved dish at home! In this post, you’ll not only learn how to make my mom’s incredible Thai Fried Chicken – Hat Yai Style, but you’ll also discover why my version beats takeout or store-bought options any day. Let’s dive in together and make some memories over a plate of this flavor-packed comfort food!
What Are Thai Fried Chicken – Hat Yai Style?
Thai Fried Chicken – Hat Yai Style hails from the southern regions of Thailand, particularly known for its vibrant street food culture. The dish is celebrated not only for its superb crunch and juicy interior but also for its aromatic marinade, packed full of bold flavors that ignite your taste buds.
When you take that first bite, you’ll experience the satisfying crunch of the golden brown rice flour coating, followed by the juicy and succulent chicken that’s been lovingly marinated. The interplay of flavors—the garlic, white pepper, soy sauce, and a touch of sugar—creates a symphony that’s perfectly balanced, inviting you in for another bite. It’s just the kind of delicious indulgence that’s perfect for gatherings, celebrations, or simply satisfying your cravings after a long day.
Whether you’re an adventurous home cook or a newbie in the kitchen, you’re guaranteed to impress family and friends when you make this dish—no special equipment required, just your love and enthusiasm!
Why You’ll Love This Recipe
Authenticity at Its Best: Unlike the overly processed and overly salty versions you may find in restaurants, this recipe stays true to the traditional flavors of southern Thailand. You’ll be taste-testing close to the original with every crispy bite.
Cost-Effective and Budget-Friendly: Making your own Thai Fried Chicken – Hat Yai Style at home means you can save a good chunk of change while indulging in this delectable treat. Plus, fresh ingredients always offer better flavor and nutrition!
Customization Galore: One beautiful aspect of this recipe is its flexibility. Feel free to adjust the seasonings or even experiment with different chicken parts. Want it spicier? Toss in a few Thai chilies into your marinade. Prefer a different dipping sauce? The options are endless!
Beginner-Friendly: With simple step-by-step instructions, this recipe is suitable for cooks of any skill level. I’ve broken down the steps clearly, ensuring you’ll know exactly what to do at each phase.
Memories Made in Every Bite: Cooking this Thai Fried Chicken – Hat Yai Style is not just about the flavors; it’s about the memories you’ll create while making it with loved ones. This dish brings people together, making the kitchen a hub of laughter and satisfaction.
Ingredients
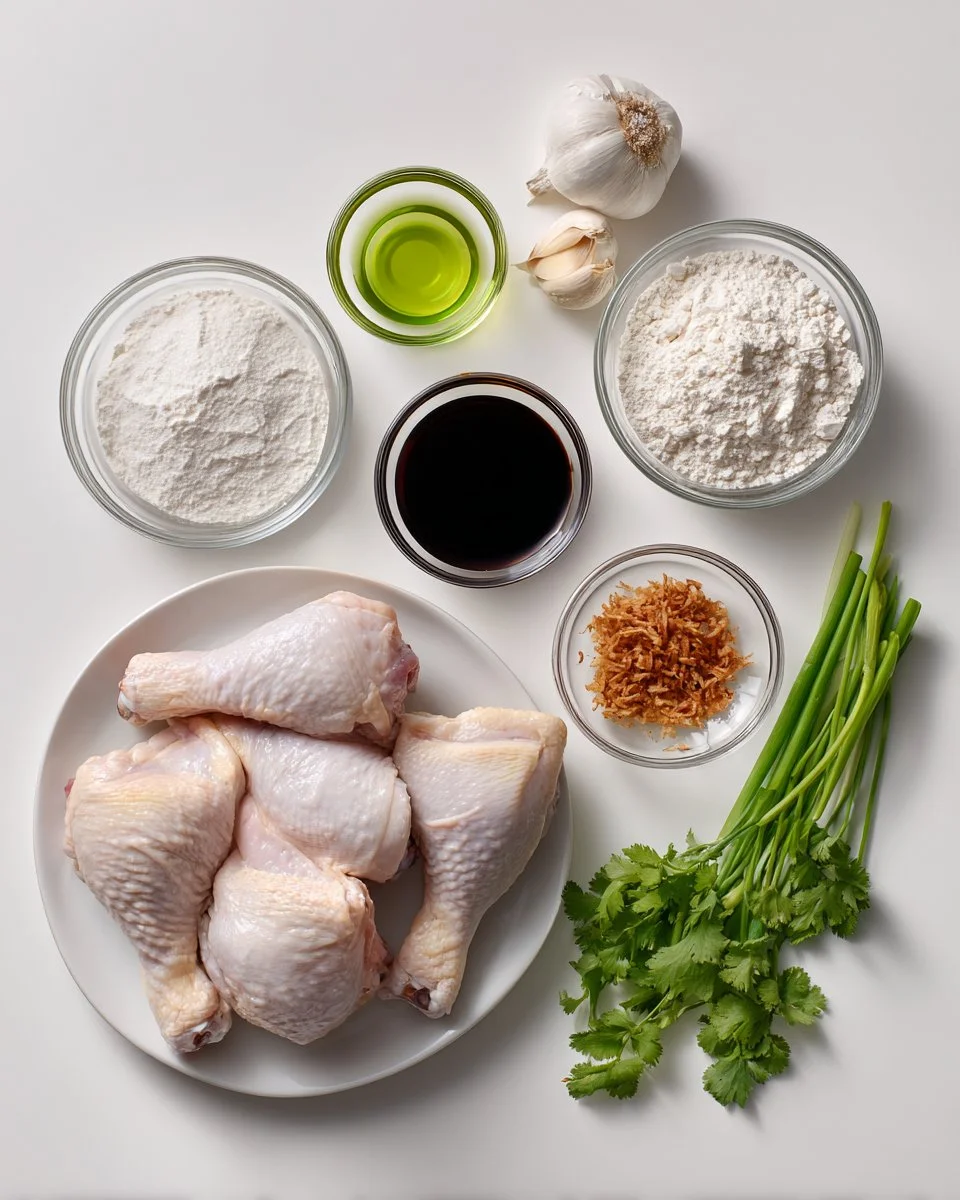
To create your own Thai Fried Chicken – Hat Yai Style, gather the following fresh and flavorful ingredients:
- 1 1/2 lb bone-in, skin-on chicken (drumsticks, thighs, or wings) – Look for organic or free-range chicken for the best flavor and quality.
- 5 cloves garlic – Fresh garlic will yield a more pungent flavor. Try using Thai garlic for an authentic touch!
- 8 cilantro stems, chopped – Use fresh cilantro for a burst of flavor. If you’re not a fan, you can use parsley as a substitute.
- 3/4 teaspoon white peppercorns or black – White pepper has a unique flavor profile that complements this dish beautifully.
- 2 1/2 teaspoons sugar – Use palm sugar if you want to be traditional; it gives a hint of caramel flavor.
- 2 tablespoons Thai soy sauce – For the best results, I recommend using Golden Mountain brand.
- 1 tablespoon fish sauce – Red boat fish sauce is a wonderful premium option that greatly enhances umami flavor.
- 1/2 cup water – Filtered or room-temperature water works best.
- 1 cup rice flour – This is what gives the chicken its signature crunch! Alternatives like all-purpose flour can be used but will yield a different texture.
- Oil for frying (canola, peanut, or neutral vegetable oil) – Ensure it’s sufficient for deep frying.
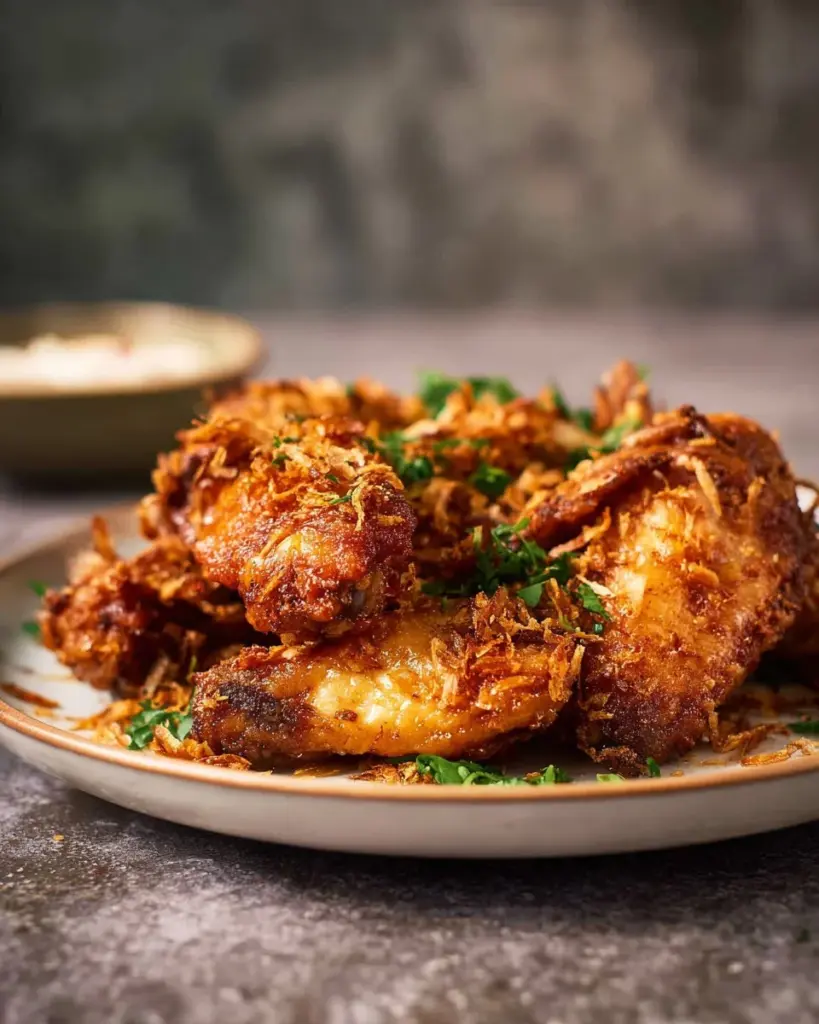
- Fried shallots (store-bought or homemade) – They add a wonderful crunch! If making your own, be sure they’re perfectly golden for the best flavor.
- Sticky rice (for serving, optional) – Coconut sticky rice pairs perfectly with this dish if you’re feeling adventurous!
- Sweet chili sauce (for dipping, optional) – A fun addition that balances out the savory spices.
Prep notes: Ensure your chicken is at room temperature before marinating. This helps in proper seasoning absorption!
Step-by-Step Instructions
Score the Chicken: Using a sharp knife, score the chicken skin lightly on each side. This helps the marinade penetrate and enhances the flavor throughout. If using thighs, trim any excess skin for cooking consistency.
Prepare the Marinade: In a mortar and pestle, pound the white peppercorns and garlic with the chopped cilantro until it forms a smooth paste. Mix this with the sugar, fish sauce, soy sauce, and water in a bowl. Combine well.
Marinate the Chicken: Coat the chicken pieces thoroughly in the marinade, ensuring every nook and cranny is covered. Cover and refrigerate for at least 4 hours (or overnight for deeper flavor). This step is crucial for that authentic taste!
Fry the Shallots: If making your own fried shallots, thinly slice 1 cup of shallots, sprinkle with a pinch of salt, and let them dry slightly. Then, carefully fry them in hot oil over medium heat until golden brown. Drain and set aside on paper towels.
Heat the Oil: Pour enough oil into a deep pot to submerge the chicken pieces (about 2 inches deep) and heat it to 375°F (190°C). A kitchen thermometer helps here!
Coat in Rice Flour and Fry: In a shallow bowl, add the rice flour. Carefully coat each marinated chicken piece in rice flour, shaking off any excess. Lower them into the hot oil, being careful not to overcrowd the pot. Fry at 300°F (150°C) for about 10-12 minutes for dark meat or until golden brown and cooked through.
Drain and Serve: Once cooked, remove the chicken and drain on paper towels to remove excess oil. Let them cool slightly before serving.
Serve your Thai Fried Chicken – Hat Yai Style with sticky rice, topped with those crispy fried shallots, and a side of sweet chili sauce for dipping. Get ready for a flavor explosion that will have you coming back for more!
Chef’s Tips:
- Timing is Key: Use a timer to avoid overcooking—trust me; nobody wants dry chicken!
- Visual Cues: Look for a golden-brown color for doneness; it’s your best friend in frying!
Expert Tips & Tricks
Quality over Quantity: The better your ingredients, the more flavorful your Thai Fried Chicken will be. Use organic chicken and high-quality sauces for the best results.
Make Ahead: You can marinate the chicken a day in advance to let those flavors intensify. Just make sure to give it enough time at room temperature before frying.
Proper Oil Temperature: Keep an eye on your oil temperature—if it’s too low, the chicken will absorb the oil instead of crisping up; if too high, it’ll burn.
Storage: Leftovers can be stored in an airtight container in the fridge for up to 3 days. Reheat in an oven to retain crispiness.
Troubleshooting: If your chicken isn’t crispy, it could be due to over-wetting the coating. Ensure the chicken is well coated and the oil is at the right temperature before frying.
Serving Suggestions
Pair your delicious Thai Fried Chicken – Hat Yai Style with classic sticky rice for a true Thai experience. If you’re feeling adventurous, add a fresh cucumber salad on the side to cut through the richness and offer a crisp contrast.
For presentation, serve the chicken on a rustic wooden platter garnished with cilantro and fried shallots. It’s a showstopper for any family gathering or casual get-together with friends.
Variations & Substitutions
- Different Flavors: Spice it up with some chili powder or serve with homemade spicy dipping sauce based on your heat preference.
- Dietary Restrictions: For a gluten-free version, use gluten-free soy sauce and ensure your rice flour is certified gluten-free.
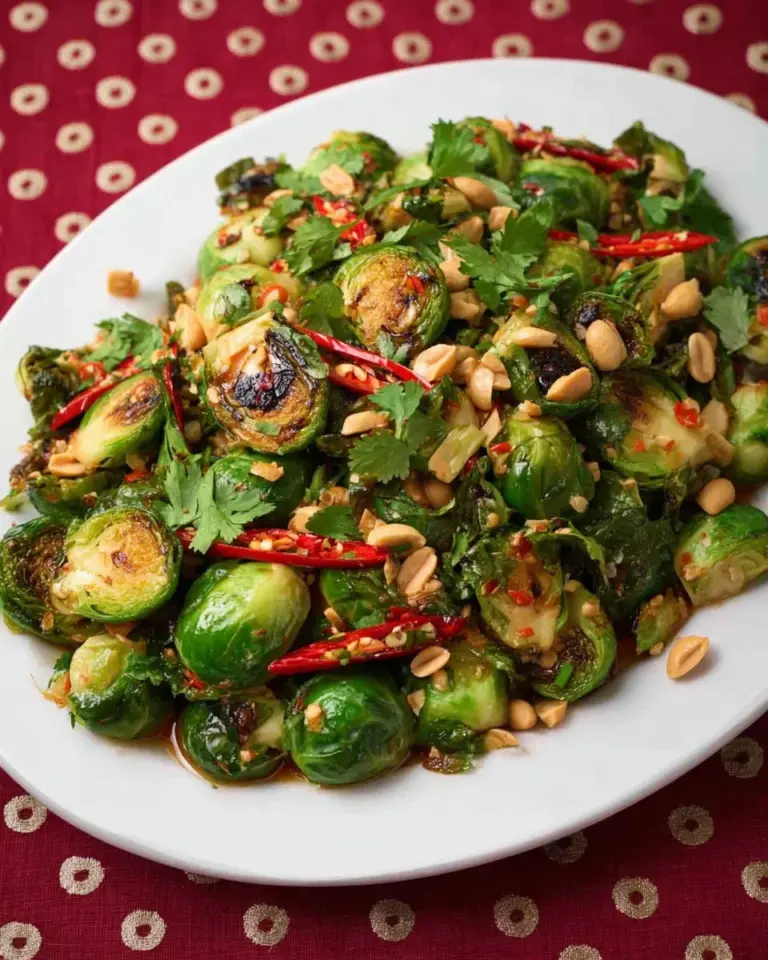
- Seasonal Variations: In winter, incorporate seasonal vegetables into your serving plate, such as roasted Brussels sprouts or a warm vegetable salad.
Nutrition & Storage Info
- Prep Time: 15 minutes (plus marinating time)
- Cook Time: 15 minutes
- Total Time: About 4 hours, 30 minutes
- Yield: Serves 4-6
- Estimated Calories per Serving: Approximately 350 calories
- Storage: Keep leftover chicken in the fridge for up to 3 days or freeze for longer storage (up to 2 months). Reheat in an oven at 375°F (190°C) until warmed through.
FAQ Section
Can I use boneless chicken for this recipe?
- Yes! Boneless chicken will still work; just adjust the cooking time accordingly to ensure it’s cooked all the way through.
What’s the best way to store leftovers?
- Place cooled chicken in an airtight container in the fridge for up to 3 days. For longer storage, seal and freeze.
Can I bake instead of fry the chicken?
- While frying gives the authentic crispy texture, you can bake them at a high temperature (425°F/220°C) as an alternative. Just be aware that the texture will differ.
What if I don’t have rice flour?
- All-purpose flour can be used in a pinch, but your crust won’t be as crisp.
Is this dish spicy?
- The level of spice can be adjusted based on your preference. Omit any added chili for a milder version.
What can I serve with this dish?
- It’s commonly served with sticky rice and sweet chili sauce, but you can add fresh salads or steamed vegetables as well.
How can I make it vegan?
- Substitute chicken with cauliflower or mushrooms, and use vegan fish sauce alternatives.
What’s the significance of fried shallots?
- They add an amazing crunch and extra flavor, enhancing the overall dish’s aroma and taste.
Can I use chicken breasts instead?
- You can! However, chicken breasts can dry out more easily, so watch your cooking time.
Do I need to marinate the chicken overnight?
- While marinating overnight gives the best flavor, a minimum of four hours will still yield tasty results.

Conclusion
This Thai Fried Chicken – Hat Yai Style recipe is not just another dish; it’s a heartfelt journey back to flavors filled with nostalgia, love, and warmth. Trust me, once you take a bite, you’ll wonder how you ever cooked without this recipe in your life. I encourage you to give it a try! I’d love to hear how it turns out for you—feel free to leave comments, or share your photos on social media.
And if you love crafting authentic dishes, check out my other Asian-inspired recipes that are sure to delight your taste buds. Happy cooking!
Thai Fried Chicken – Hat Yai Style
Ingredients
Method
- Score the chicken skin lightly on each side with a sharp knife.
- In a mortar and pestle, pound the white peppercorns and garlic with chopped cilantro to form a smooth paste. Mix with sugar, fish sauce, soy sauce, and water in a bowl.
- Coat the chicken pieces in the marinade thoroughly, cover, and refrigerate for at least 4 hours (or overnight).
- If making fried shallots, thinly slice shallots, sprinkle with salt, let dry, and fry in hot oil until golden.
- Heat oil in a deep pot to 375°F (190°C).
- In a shallow bowl, coat marinated chicken in rice flour, shaking off excess. Fry in hot oil at 300°F (150°C) for about 10-12 minutes or until golden brown.
- Remove cooked chicken and drain on paper towels before serving.